The Linux Kernel is mighty when it comes to virtual devices for testing purposes. In this guide we are going to setup a virtual wlan hotspot using virtual wlan devices on a single Linux machine. I wrote this guide while developing an automated test for wpa_supplicant in order to document and understand the principles behind it.
In this guide, we are going to
- Setup two virtual wlan interfaces (for the master and one for the client)
- Isolate the master wlan interface in a separate Linux network namespace so it becomes “invisible”
- Create a virtual access point using
hostapd - Connect the client to the network
- Ping the master node from the client
I’m using a virtual machine running openSUSE Leap 15.1. I do not see any reason why it should not work on any other Linux distribution as well.
Setup of the wlan interfaces
There is a Linux Kernel module that provides virtual wlan-interfaces for testing purposes: mac80211_hwsim.
When loading this kernel module, by default you get two wlan interfaces (wlan0 and wlan1) plus a monitor device hwsim0. Like real wlan interfaces, wlan0 and wlan1 can be tuned to channels. Only wlan interfaces that are on the same channel, receive radio frames from each other.
We start this guide by loading the mac80211_hwsim module:
leap-15_1:~ # modprobe mac80211_hwsim
leap-15_1:~ # ip link
[...]
8: wlan0: mtu 1500 qdisc noop state DOWN mode DEFAULT group default qlen 1000
link/ether 02:00:00:00:00:00 brd ff:ff:ff:ff:ff:ff
9: wlan1: mtu 1500 qdisc mq state DOWN mode DEFAULT group default qlen 1000
link/ether 02:00:00:00:01:00 brd ff:ff:ff:ff:ff:ff
10: hwsim0: mtu 1500 qdisc noop state DOWN mode DEFAULT group default qlen 1000
link/ieee802.11/radiotap 12:00:00:00:00:00 brd ff:ff:ff:ff:ff:ff</pre>
You can see, that we got three interfaces: wlan0, wlan and hswim0. hswim0 is another purely virtual interface, that lets you listen to all frames on all channels. We do not need this one in this guide.
You can use the radios=N option, if you need more interfaces
leap-15_1:~ # modprobe mac80211_hwsim radios=4
leap-15_1:~ # ip l
[...]
11: wlan0: mtu 1500 qdisc noop state DOWN mode DEFAULT group default qlen 1000
link/ether 02:00:00:00:00:00 brd ff:ff:ff:ff:ff:ff
12: wlan1: mtu 1500 qdisc mq state DOWN mode DEFAULT group default qlen 1000
link/ether 02:00:00:00:01:00 brd ff:ff:ff:ff:ff:ff
13: wlan2: mtu 1500 qdisc noop state DOWN mode DEFAULT group default qlen 1000
link/ether 02:00:00:00:02:00 brd ff:ff:ff:ff:ff:ff
14: wlan3: mtu 1500 qdisc noop state DOWN mode DEFAULT group default qlen 1000
link/ether 02:00:00:00:03:00 brd ff:ff:ff:ff:ff:ff
15: hwsim0: mtu 1500 qdisc noop state DOWN mode DEFAULT group default qlen 1000
link/ieee802.11/radiotap 12:00:00:00:00:00 brd ff:ff:ff:ff:ff:ff</pre>
For this guide, two interfaces are enough.
Namespace-isolating the interfaces
In order to accurately test the wifi-master (that’s the access point we are connecting to) and the wifi-client (the client connecting to that access point) we need to put the interfaces into different network namespaces. Namespaces are an abstraction in the Linux kernel, to isolate processes and resources. More specifically, we use network namespace to create two shells, where each shell only has one wlan interface. Like this, one shell acts as wifi_master and acts as access point (and only sees wlan0), and the second shell acts as client and only sees wlan1. This is necessary, so that we force the network traffic to go from one interface to the other, and not directly to the target interface:
With network namespace separation, each shell only sees their interface - thus they are forced to go over their wlan interface to reach the other ip address
So, first we create the wifi_master namespace
leap-15_1:~ # ip netns add wifi_master
leap-15_1:~ # ip netns list
wifi_master
Now, we are going to run a separate shell in the wifi_master namespace and assign the wlan0 device to the pid of the new shell. For that, open a new terminal window and execute the following
# This will be the isolated wifi master (Access point)
leap-15_1:~ # ip netns exec wifi_master bash
leap-15_1:~ # echo $BASHPID
2173
The last line prints out the process id (or pid) of the shell. We need that, because the wlan interface can only be assigned to a pid via the iw utility. In another shell (this will be the client shell) we assign the wlan0 interface to the wifi_master shell
leap-15_1:~ # iw phy phy0 set netns 2173
After that, check the interfaces that are available for each of the shells: for the wifi_master shell and for the client shell by running ip link
# wifi_master shell
leap-15_1:~ # ip link
1: lo: mtu 65536 qdisc noop state DOWN mode DEFAULT group default qlen 1000
link/loopback 00:00:00:00:00:00 brd 00:00:00:00:00:00
22: wlan0: mtu 1500 qdisc noop state DOWN mode DEFAULT group default qlen 1000
link/ether 02:00:00:00:00:00 brd ff:ff:ff:ff:ff:ff</pre>

# client shell
leap-15_1:~ # ip link
1: lo: mtu 65536 qdisc noqueue state UNKNOWN mode DEFAULT group default qlen 1000
link/loopback 00:00:00:00:00:00 brd 00:00:00:00:00:00
23: wlan1: mtu 1500 qdisc mq state DOWN mode DEFAULT group default qlen 1000
link/ether 02:00:00:00:01:00 brd ff:ff:ff:ff:ff:ff
24: hwsim0: mtu 1500 qdisc noop state DOWN mode DEFAULT group default qlen 1000
link/ieee802.11/radiotap 12:00:00:00:00:00 brd ff:ff:ff:ff:ff:ff</pre>
The wifi_master has the wlan0 interfaces, the client shell has the other interfaces (especially wlan1) but not wlan0 anymore.

Left side: wifi_master, right side wifi_client.
At this stage we have two shells, one has wlan0 the other one wlan1 (and the other interface we don’t care about) and we can setup a wlan hotspot with hostapd.
Creating access point with hostapd
First make sure hostapd is installed (ships with your default package manager for most distributions)
leap-15_1:~ # zypper in hostapd
Then create the following, very basic hostapd.conf file. The absolute path does not matter, as long as the shell and the file are in the same path
interface=wlan0
driver=nl80211
country_code=NL
ssid=Virtual Wifi
channel=0
hw_mode=b
wpa=3
wpa_key_mgmt=WPA-PSK
wpa_pairwise=TKIP CCMP
wpa_passphrase=TopSecretWifiPassphrase
auth_algs=3
beacon_int=100</pre>
In the wifi_master shell now run hostapd with the custom hostapd.conf file
leap-15_1:~ # hostapd hostapd.conf
Configuration file: hostapd.conf
wlan0: interface state UNINITIALIZED->COUNTRY_UPDATE
ACS: Automatic channel selection started, this may take a bit
wlan0: interface state COUNTRY_UPDATE->ACS
wlan0: ACS-STARTED
wlan0: ACS-COMPLETED freq=2437 channel=6
Using interface wlan0 with hwaddr 02:00:00:00:00:00 and ssid "Virtual Wifi"
wlan0: interface state ACS->ENABLED
wlan0: AP-ENABLED
In the client shell, create the following wpa_supplicant.conf file. Also here, the absolute path is irrelevant, as long as the shell is in the same directory.
network={
  ssid="Virtual Wifi"
  key_mgmt=WPA-PSK
  psk="TopSecretWifiPassphrase"
}
Execute wpa_supplicant with the config file:
leap-15_1:~ # wpa_supplicant -B -i wlan1 -c wpa_supplicant.conf
This activates the interface, scans for wireless networks and connects to the known network “Virtual Wifi”.
Now monitor the wifi_master shell. Something like this should pop up in the next seconds
wlan0: STA 02:00:00:00:01:00 IEEE 802.11: authenticated
wlan0: STA 02:00:00:00:01:00 IEEE 802.11: associated (aid 1)
wlan0: AP-STA-CONNECTED 02:00:00:00:01:00
wlan0: STA 02:00:00:00:01:00 RADIUS: starting accounting session 1A50DED4A77B3890
wlan0: STA 02:00:00:00:01:00 WPA: pairwise key handshake completed (RSN)
This tells us that wlan0 and wlan1 are now connected and authenticated to each other. Congratulations! You just connected to your own virtual wlan network :-)
ping!
Now we want to test, if we can reach the wifi master via the wifi client.
The easiest way is to use IPv6 link-local addresses, but we are also going to do a more conservative IPv4 ping test.
Zero-configuration ping using IPv6
Every IPv6 capable device gets a unique link-local address without any configuration. This is pretty cool and handy - we are going to use this property for our most simple first ping test. First in the wifi_master shell, we need to find out what our link-local address is.
For that we send hostapd in the background (CTRL+Z, followed by bg) and run ip -6 a to list our IPv6 addresses
# wifi-master shell
^Z
[1]+ Stopped hostapd hostapd.conf
leap-15_1:~ # bg
[1]+ hostapd hostapd.conf
leap-15_1:~ # ip -6 a
22: wlan0: mtu 1500 state UP qlen 1000
    inet6 fe80::ff:fe00:0/64 scope link
        valid_lft forever preferred_lft forever
leap-15_1:~ #
The IPv6 address of the wifi-master is fe80::ff:fe00:0.
In our client shell, we are going to ping that address
# client shell
leap-15_1:~ # ping fe80::ff:fe00:0%wlan1
PING fe80::ff:fe00:0%wlan1(fe80::ff:fe00:0%wlan1) 56 data bytes
64 bytes from fe80::ff:fe00:0%wlan1: icmp_seq=1 ttl=64 time=0.823 ms
64 bytes from fe80::ff:fe00:0%wlan1: icmp_seq=2 ttl=64 time=0.357 ms
64 bytes from fe80::ff:fe00:0%wlan1: icmp_seq=3 ttl=64 time=0.314 ms
64 bytes from fe80::ff:fe00:0%wlan1: icmp_seq=4 ttl=64 time=0.285 ms
64 bytes from fe80::ff:fe00:0%wlan1: icmp_seq=5 ttl=64 time=0.422 ms
Note: The address we are pinging is fe80::ff:fe00:0%wlan1 - Link local addresses need the interface as well where they can be found. This is necessary, as every device has it’s own network of link-local addresses. For any other IPv6 addresses, the interface suffix is not necessary.
Pretty neat - we are able to ping the wifi-master without any IP configuration. Our virtual wifi network works!
Ping over IPv4 with static configuration
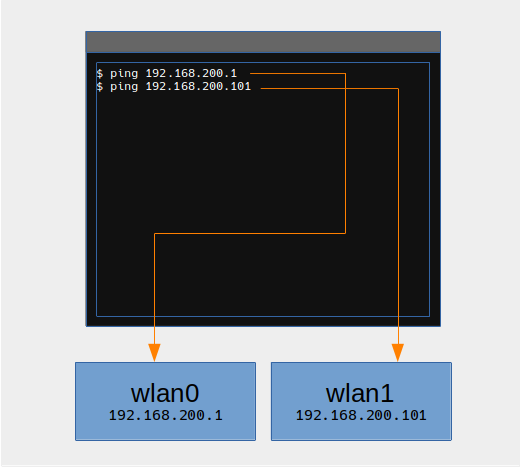
IPv4 is a bit more complicated, as we need to first configure the interfaces. We are going to assign static ip-addresses to wlan0 and wlan1by using ip addr add commands:
# on the wifi_master shell
leap-15_1:~ # ip addr add 192.168.200.1/24 dev wlan0
leap-15_1:~ # ip a
1: lo: mtu 65536 qdisc noop state DOWN group default qlen 1000
link/loopback 00:00:00:00:00:00 brd 00:00:00:00:00:00
22: wlan0: mtu 1500 qdisc mq state UP group default qlen 1000
link/ether 02:00:00:00:00:00 brd ff:ff:ff:ff:ff:ff
inet 192.168.200.1/24 scope global wlan0
valid_lft forever preferred_lft forever
inet6 fe80::ff:fe00:0/64 scope link
valid_lft forever preferred_lft forever

# on the wifi client shell
leap-15_1:~ # ip addr add 192.168.200.101/24 dev wlan1
leap-15_1:~ # ip a
[...]
23: wlan1: mtu 1500 qdisc mq state UP group default qlen 1000
link/ether 02:00:00:00:01:00 brd ff:ff:ff:ff:ff:ff
inet 192.168.200.101/24 scope global wlan1
valid_lft forever preferred_lft forever
inet6 fe80::ff:fe00:100/64 scope link
valid_lft forever preferred_lft forever
[...]
Now in the client shell we can ping the wifi-master
# again in the client shell run
leap-15_1:~ # ping 192.168.200.1
PING 192.168.200.1 (192.168.200.1) 56(84) bytes of data.
64 bytes from 192.168.200.1: icmp_seq=1 ttl=64 time=0.116 ms
64 bytes from 192.168.200.1: icmp_seq=2 ttl=64 time=0.332 ms
64 bytes from 192.168.200.1: icmp_seq=3 ttl=64 time=0.298 ms
64 bytes from 192.168.200.1: icmp_seq=4 ttl=64 time=0.154 ms
64 bytes from 192.168.200.1: icmp_seq=5 ttl=64 time=0.293 ms
^C
--- 192.168.200.1 ping statistics ---
5 packets transmitted, 5 received, 0% packet loss, time 4038ms
rtt min/avg/max/mdev = 0.116/0.238/0.332/0.088 ms</pre>
Congratulations! You have successfully created a virtual wlan network of two interface, that are separated in network namespaces and are able to communicate with each other.
Known issues
Adding interface to namespace via ip link set doesn’t work
I know but I don’t know why.
leap-15_1:~ # ip link set dev wlan1 netns wifi_master
RTNETLINK answers: Invalid argument
Using the iw utility works, but then you are limited to assigning the interface only to one single process. In the end I decided to follow this path and work from a separate shell
# This will be the isolated shell
leap-15_1:~ # ip netns exec wifi_master bash
leap-15_1:~ # echo $BASHPID
2173

# From another shell, where wlan0 is still accessible
leap-15_1:~ # iw phy phy0 set netns 2713
It’s not the most elegant solution, but it works.